In this blog we describe how to Integrate Google Cloud Build with Jfrog Artifactory.We will build a sample containerized application that pulls dependencies from Artifactory, with Maven and Java as our sample package and language.
JFrog is a software company that provides a platform for managing and distributing software artifacts. The company’s main product, JFrog Artifactory, is a universal artifact repository that supports all major packaging formats, including Docker, Maven, npm, and NuGet. JFrog also offers other tools such as JFrog Xray and JFrog Mission Control for managing and monitoring software artifacts across an organization.
What is an Artifact ?
An artifact is a by-product of software development. It’s anything that is created so a piece of software can be developed. This might include things like data models, diagrams, setup scripts etc.
“Artifact” is a pretty broad term when it comes to software development. Most pieces of software have a lot of artifacts that are necessary for them to run. Some artifacts explain how a piece of software is supposed to work, while others actually allow that program to run.
Artifacts are important to hold onto throughout the development process of any piece of software, and even long after.
Without each and every artifact, it can make developing a piece of software much more difficult over time. This is especially true if development switches hands. When a new developer is put on a project, one of the first things they’ll want to do is go through the artifacts to get an idea of how the software works.
If an artifact is missing, that leaves a developer in the dark. This is why most artifacts are kept in a repository. This lets relevant developers access the artifacts at any time, all from one place.
What is Artifactory ?
Artifactory is Jfrog’s tool which acts as an artifact repository.It’s a place to store all your Binaries,Builds & Metadata.
Prerequisites:
Google Cloud Account : Should Enable Google Cloud Build
JFrog Account :We used 30 days trial from Google Cloud’s MarketPlace (https://console.cloud.google.com/marketplace/product/jfrog/jfrog-pro-team-saas)
First,Let’s Install and Setup Google Cloud CLI.We are using Ubuntu 20.04 LTS (Debian).You can skip this step if you have source code in Google Cloud Shell and edit using Google Cloud Editor.
1)To download the Linux 64-bit archive file, at the command line, run:
$ curl -O https://dl.google.com/dl/cloudsdk/channels/rapid/downloads/google-cloud-cli-413.0.0-linux-x86_64.tar.gz
2)Extract the contents of the file to any location on your file system (preferably your Home directory)
$ tar -xf google-cloud-cli-413.0.0-linux-x86.tar.gz
3)Run the installation script from the root of the folder you extracted to using the following command:
$ ./google-cloud-sdk/install.sh
4)To initialize the gcloud CLI, run:
$ ./google-cloud-sdk/bin/gcloud init
5)After initialize,add to path :
$ export PATH=$PATH:/home/user/google-cloud-sdk/bin
After this we can run gcloud CLI commands directly.
Eg : $ gcloud info
For reference for setting up Google Cloud CLI refer : https://cloud.google.com/sdk/docs/install-sdk#linux
Next,we can clone the source code from github.
$ git clone https://github.com/Keyshelltechs/Keyshell_Jfrog.git
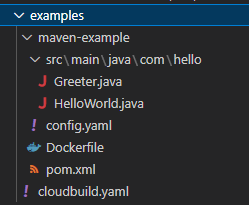
Folder Structure :
📁examples
📃DockerFile
📃cloudbuild.yaml
First we have to build a Maven Image that includes JFrog CLI. For that we can use cloudbuild.yaml and DockerFile.
Snippet of cloudbuild.yaml
- name: 'gcr.io/cloud-builders/docker'
  args:
  - 'build'
  - '--build-arg=BASE_IMAGE=gcr.io/cloud-builders/mvn:3.5.0-jdk-8'
  - '--tag=gcr.io/$PROJECT_ID/java/jfrog:1.54.1'
  - '.'
  wait_for: ['-']
gcr.io/cloud-builders is a public container registry.
Here we use an image of Maven(mvn:3.5.0-jdk-8) from gcr.io/cloud-builders as base image to build Maven Image including JFrog CLI.You can see the image here.
DockerFile
ARG BASE_IMAGE=gcr.io/${PROJECT_ID}/mvn:3.5.0-jdk-8
FROM ${BASE_IMAGE}

ARG JFROG_CLI_VERSION=1.54.1

# PR submitted to download versioned JFrog CLI

RUN apt-get update -qqy && apt-get install -qqy curl \
  && cd /tmp \
  && curl -fL https://getcli.jfrog.io | sh \
  && mv jfrog /usr/bin/ \
  && apt-get remove -qqy --purge curl \
  && rm /var/lib/apt/lists/*_*

ENTRYPOINT ["jfrog"]
Here we use this DockerFile to build the final image by adding JFrog CLI to the base image.
So the final image will be tagged as gcr.io/$PROJECT_ID/java/jfrog:1.54.1
Now let’s build this image using Google Cloud Shell/Google Cloud CLI.
To build using Google Cloud Shell use this command :
$ gcloud builds submit –config=cloudbuild.yaml –project=your_google_project_id .
To build using Google Cloud CLI use this command :
$ gcloud builds submit –config=cloudbuild.yaml .
If the build is successful we can view the image in your GCP’s container registry.
Container Registry > Images > Java > JFrog
To check build results navigate to Cloud Build > History
Now we have built a Maven Image that includes JFrog CLI.We have to configure it to point it to Jfrog Artifactory.
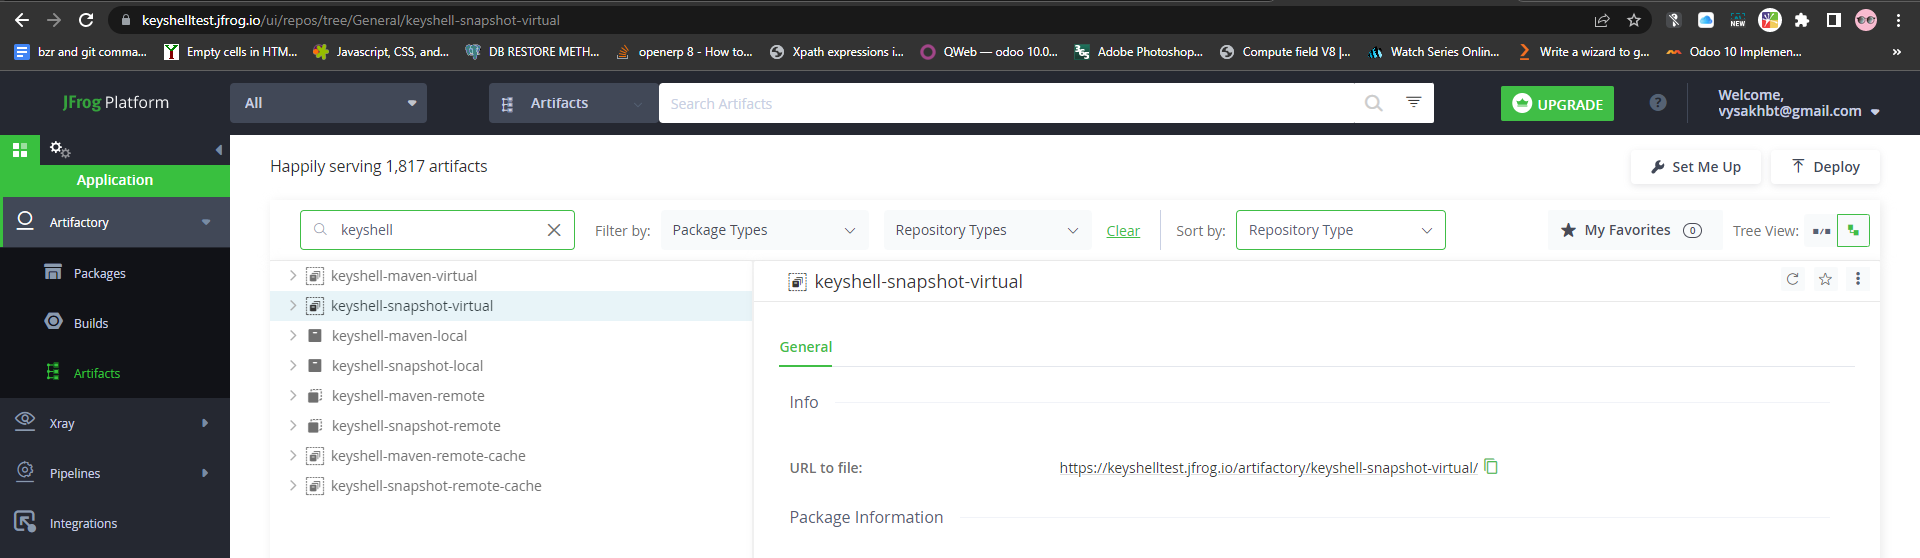
For that first we have to create a Virtual Snapshot Repository and a Virtual Release Repository in Jfrog.
For creating these we have to login to our Jfrog Account.
After Logging in, let’s take a look on how we can create a Virtual Release Repository.
For creating a Virtual Repository , first we have to create a local and remote repository.
Before that let’s check what a local,remote and virtual repository is.
Local Repository: In JFrog, a local repository is a repository that is stored on the same machine as the JFrog Artifactory instance. It functions as a cache of all the artifacts that have been downloaded from remote repositories, and as a target for deploying artifacts that have been built locally.The local repository allows for faster access to frequently used artifacts and can also be used to manage internal artifacts that should not be exposed to external systems.
Remote Repository: In JFrog, a remote repository is a repository that is stored on a different machine or in a different location than the JFrog Artifactory instance. It generally refers to external repositories from where the artifacts are downloaded. A remote repository can be located in a different Artifactory server, or it can be a repository hosted by a third-party provider, such as Maven Central or JCenter. Remote repositories provide a way to access external artifacts that are needed for a build, and to share artifacts that have been deployed to Artifactory with other teams or systems. When a client requests an artifact that is not present in any of its local repositories, Artifactory will check the remote repositories in the order they are defined in the system, and will download the artifact from the first repository that contains it.
Virtual Repository: In JFrog, a virtual repository is a virtual aggregation of multiple local, remote and other virtual repositories. It allows you to access all of your repositories as if they were a single, unified repository. This makes it easy to manage and access multiple repositories from a single URL, and it also allows you to easily switch between different sets of repositories depending on your needs.
For example, you can use a virtual repository to aggregate all of your local, remote and other virtual repositories into a single URL, and then use that URL as the repository in your build tool’s configuration. This allows you to switch between different sets of repositories without changing your build configuration. Additionally, it allows you to manage access and permissions for a group of repositories together, and also search for artifacts across all repositories in the virtual repository.
Virtual repositories can be very useful to organize your artifacts and make it easier to manage access and permissions for different projects, teams or environments.
Now let’s create Local,Remote and Virtual Repository
To create Local Repository :
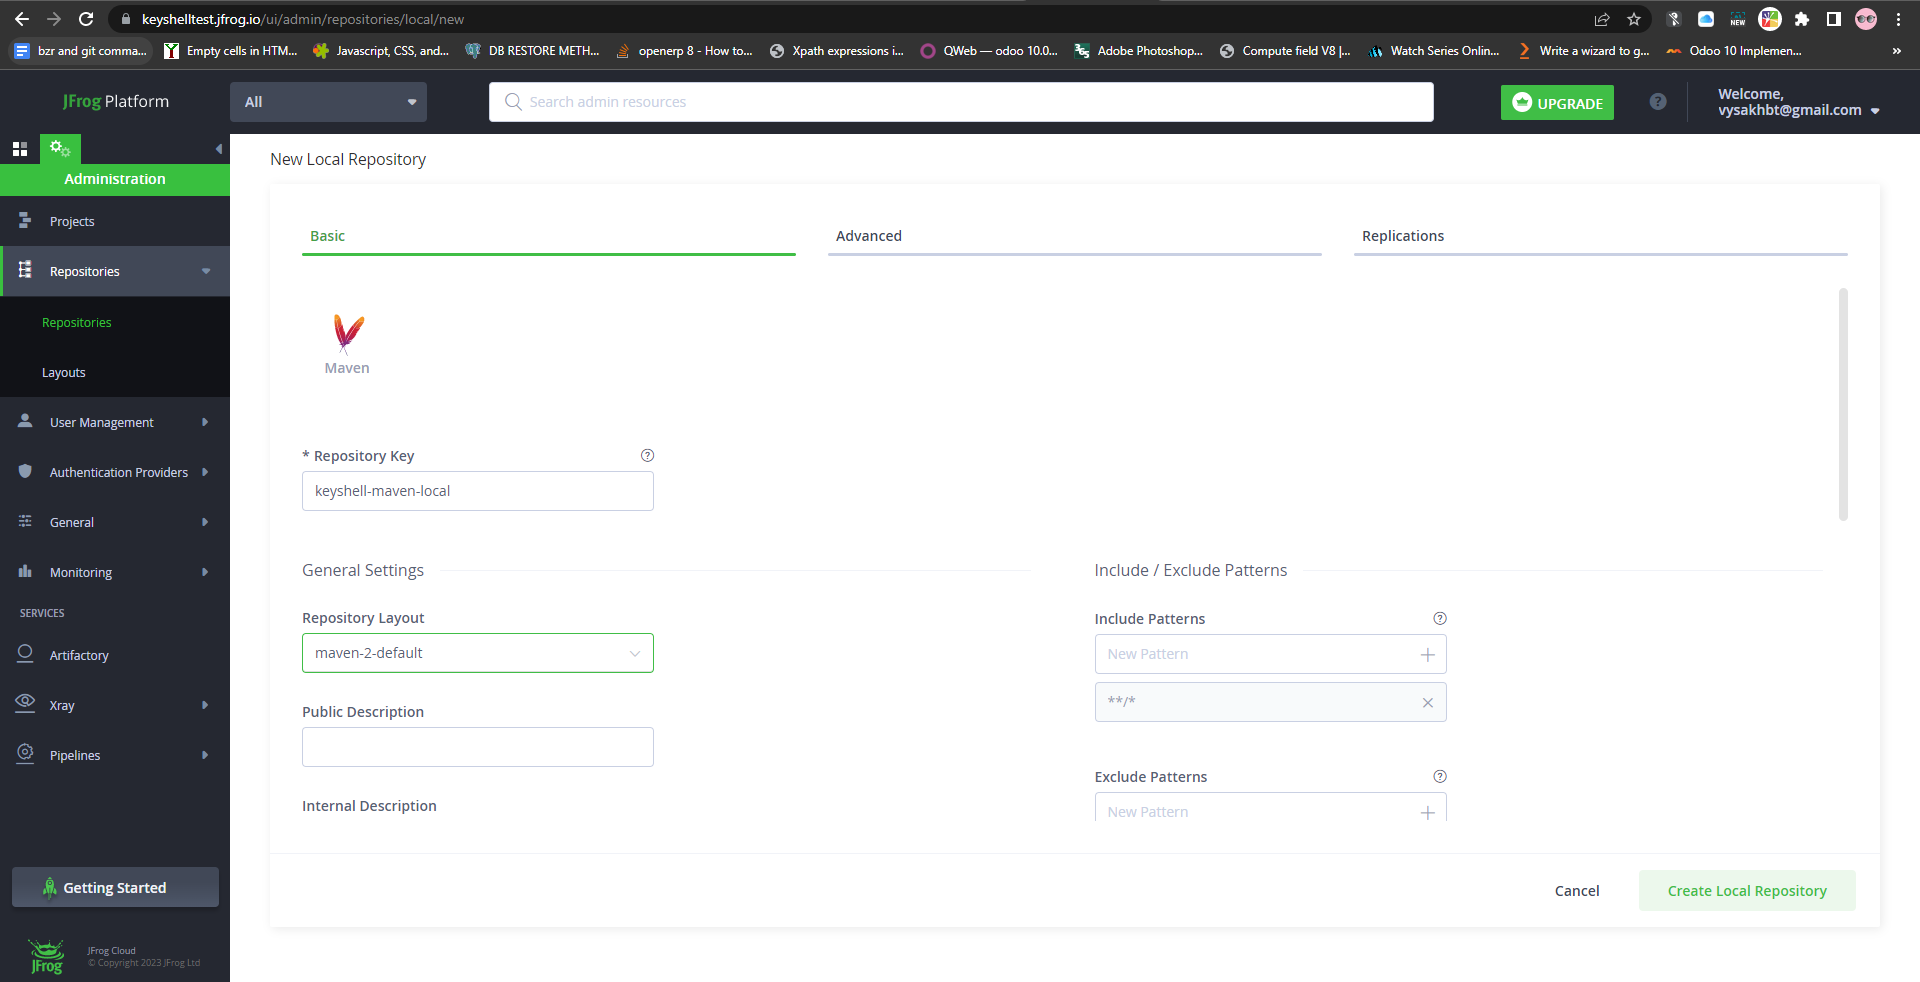
Select Administration > Repositories > Repositories > Add Repositories > Local Repository
Then select “Maven” as Package Type.
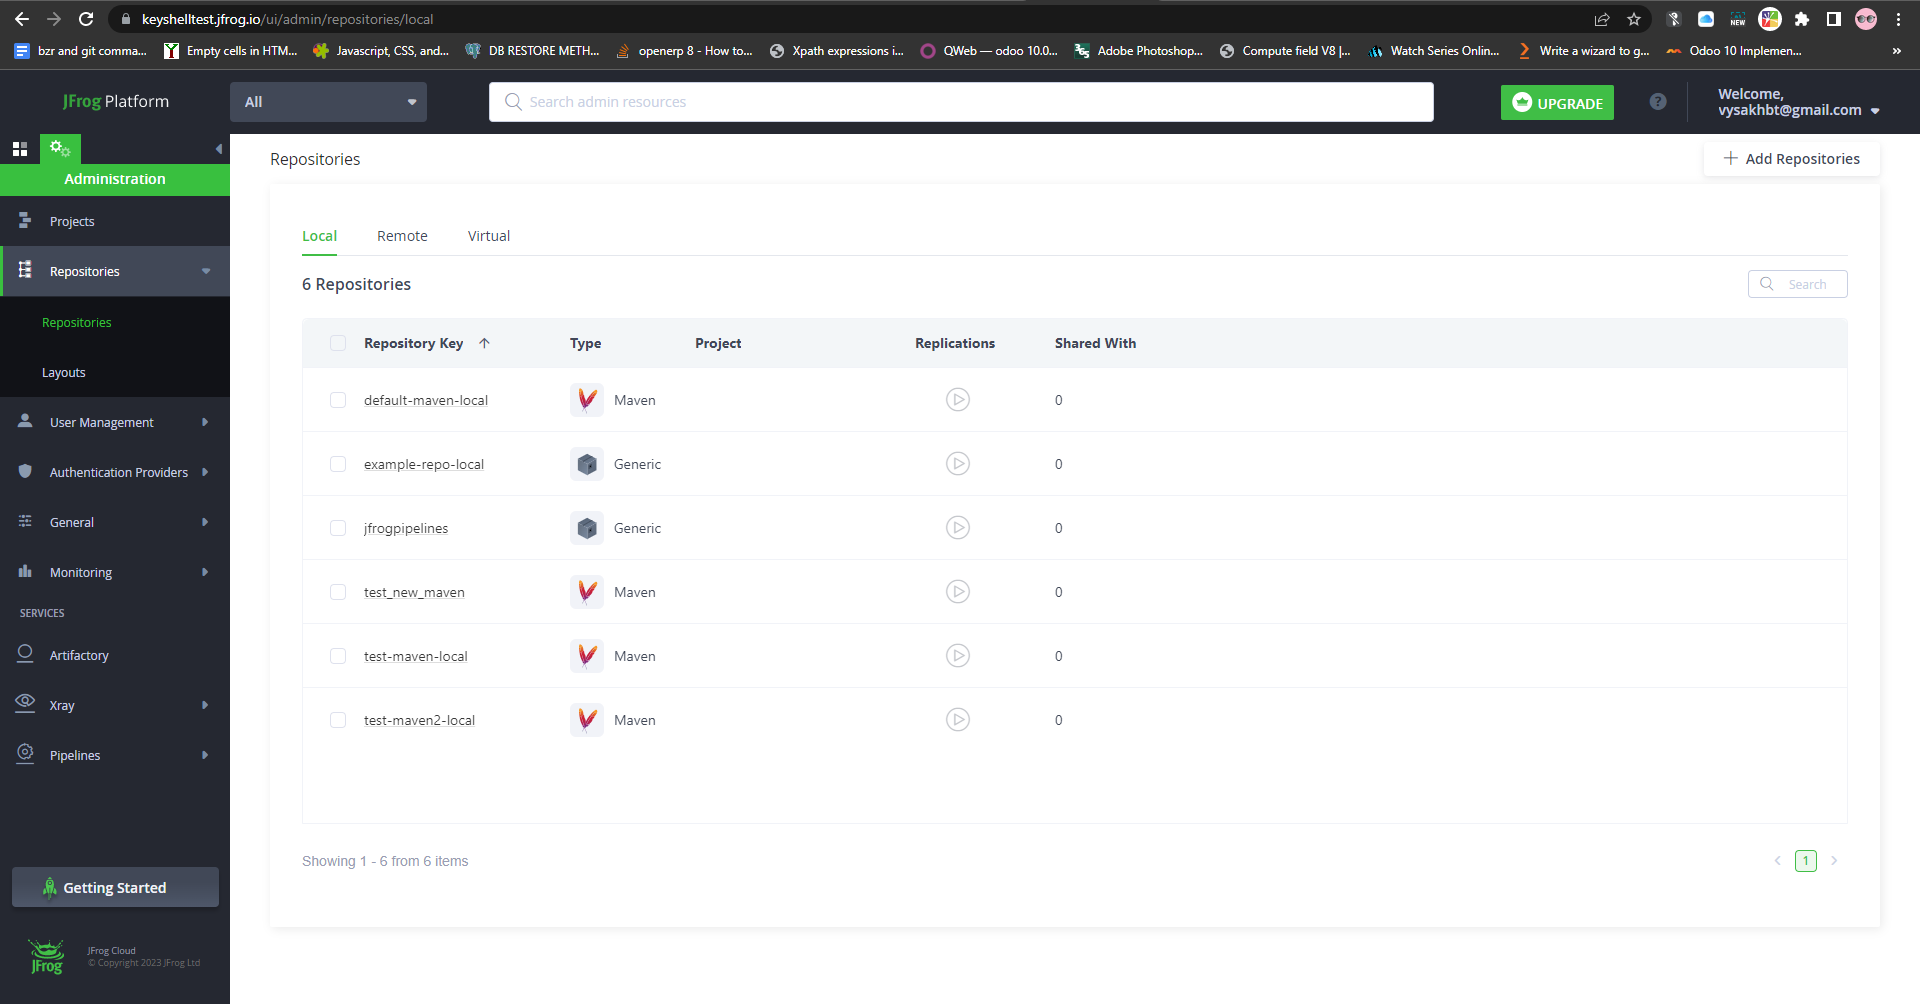
Add “keyshell-maven-local” as Repository Key and click on “Create Local Repository”
To create Remote Repository :
Select Administration > Repositories > Repositories > Add Repositories > Remote Repository
Then select “Maven” as Package Type.
Add “keyshell-maven-remote” as Repository Key.
Add “https://jcenter.bintray.com” as URL. (JCenter is a public, Bintray-hosted repository that is used to store and distribute Java and Android libraries. JCenter is maintained by JFrog)
Now click on “Create Remote Repository”

To create Virtual Repository :
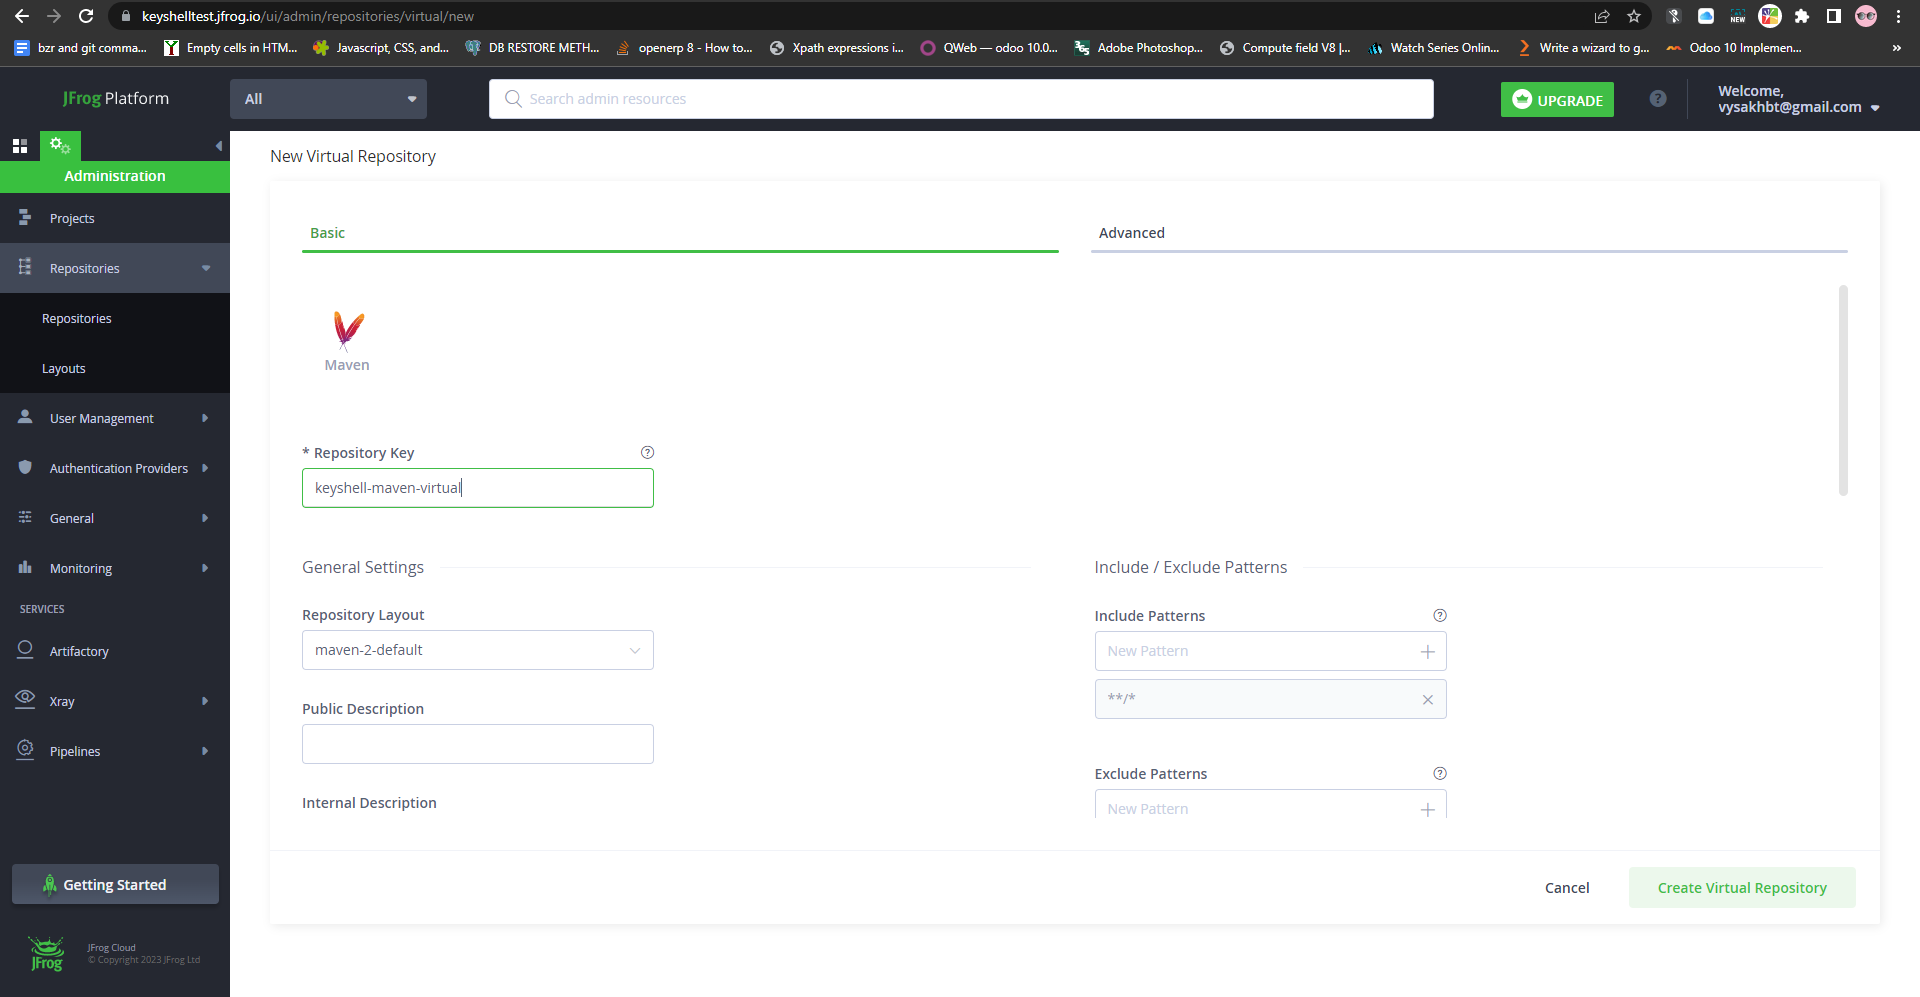
Select Administration > Repositories > Repositories > Add Repositories > Virtual Repository
Then select “Maven” as Package Type.
Add “keyshell-maven-virtual” as Repository Key.
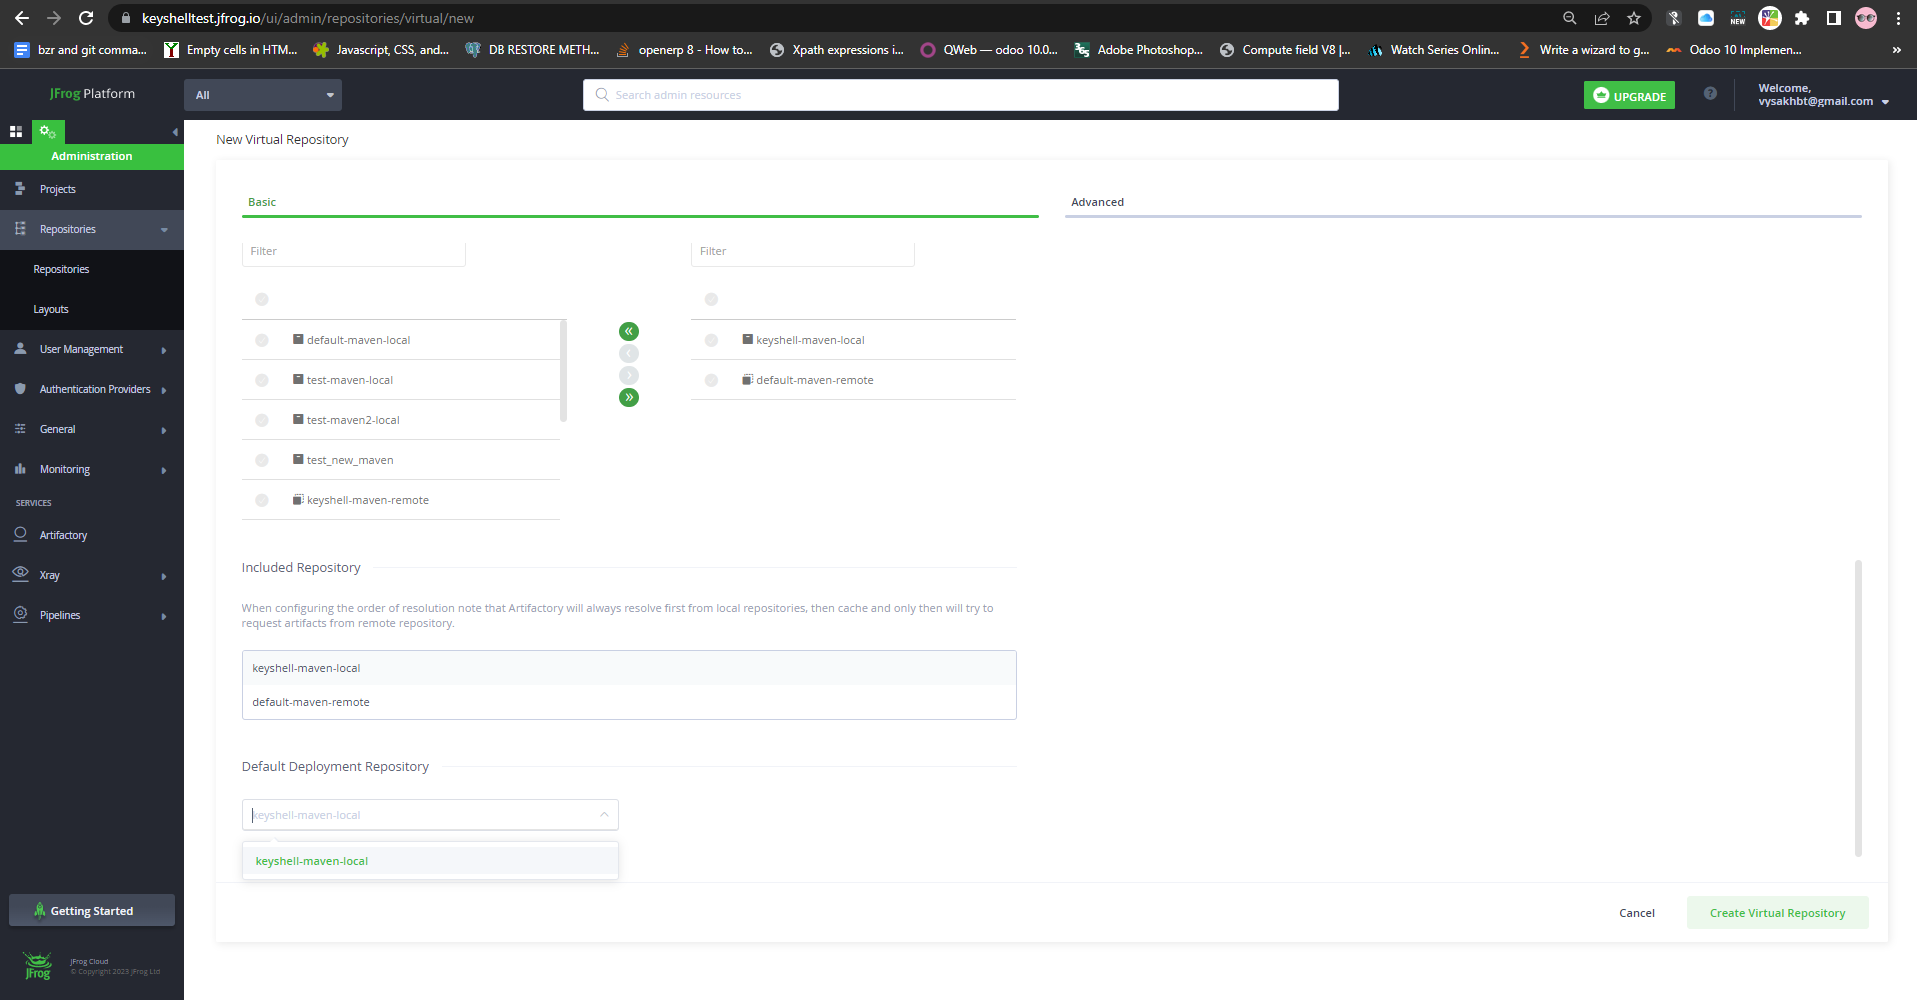
Here we have the option to select from our local,remote and other virtual repositories.
Now select “keyshell-maven-local” and “keyshell-maven-remote” from the list in the same order.
Also select “keyshell-maven-local” as Default Deployment Repository.
Now click on “Create Virtual Repository”.
Now we have created a Virtual Release Repository in Jfrog.Repeat the same steps to create Virtual Snapshot Repository.
Now let’s go inside our “examples” folder.
Here cloudbuild.yaml file is used to Configure JFrog CLI to point to JFrog Artifactory,Build a sample maven project and then containerize java app.
Snippet of cloudbuild.yaml
# Configure JFrog CLI to point to JFrog Artifactory

- name: 'docker.bintray.io/google-cloud-builder/java/jfrog:0.1'

  entrypoint: 'bash'

  args: ['-c', 'jfrog rt c rt-mvn-repo --url=https://[ARTIFACTORY-URL]/artifactory --user=[ARTIFACTORY-USER] --password=[ARTIFACTORY-PASSWORD OR ARTIFACTORY IDENTITY TOKEN]']

  dir: 'maven-example'

# Build a sample maven project

- name: 'gcr.io/$PROJECT_ID/java/jfrog'

  args: ['rt', 'mvn', "clean install", 'config.yaml', '--build-name=mybuild', '--build-number=$BUILD_ID']

  dir: 'maven-example'

# Containerize java app

- name: 'gcr.io/cloud-builders/docker'

  args:

  - 'build'

  - '--tag=gcr.io/$PROJECT_ID/java-app:${BUILD_ID}'

  - '.'

  dir: 'maven-example'
Here docker.bintray.io/google-cloud-builder/java/jfrog:0.1 is Jfrog Artifactory image which is used to Configure JFrog CLI to point to the JFrog Artifactory.
We have to update this cloudbuild.yaml with actual values of [ARTIFACTORY-USER], [ARTIFACTORY-URL] and [ARTIFACTORY-PASSWORD OR ARTIFACTORY IDENTITY TOKEN]
ARTIFACTORY IDENTITY TOKEN can be generated after logging to Jfrog.
(Click on the user button on top right corner > Edit Profile > Unlock > Generate Identity Token)
The files required to build a sample maven project is under the “maven-example” folder.We have to edit the “config.yaml” file in this directory.
config.yaml
version: 1

type: maven

resolver:

  snapshotRepo: keyshell-snapshot-virtual

  releaseRepo: keyshell-maven-virtual

  serverID: rt-mvn-repo

deployer:

  snapshotRepo: keyshell-snapshot-virtual

  releaseRepo: keyshell-maven-virtual

  serverID: rt-mvn-repo
Update the values of snapshotRepo and releaseRepo with the Jfrog’s virtual repositories which we have created earlier.
Dockerfile in this directory is used to containerize the java app.
pom.xml file is used in Apache Maven-based Java projects.It includes information such as the project’s dependencies on other libraries, the build plugins that should be used, and the project’s version number. This file is used by Maven to build and manage the project.
src directory contains the java program to display “Hello World”.
Now let’s build this cloudbuild.yaml (inside examples folder) using Google Cloud Shell/Google Cloud CLI.
To build using Google Cloud Shell use this command :
$ gcloud builds submit –config=cloudbuild.yaml –project=your_google_project_id .
To build using Google Cloud CLI use this command :
$ gcloud builds submit –config=cloudbuild.yaml .
If the build is successful we can view the image in your GCP’s container registry.
Container Registry > Images > java-app
To check build results navigate to Cloud Build > History
Once the app is containerized, it can be deployed on GKE or any other compute target.
We can view the Artifacts in Jfrog.
Application > Artifactory> Artifacts
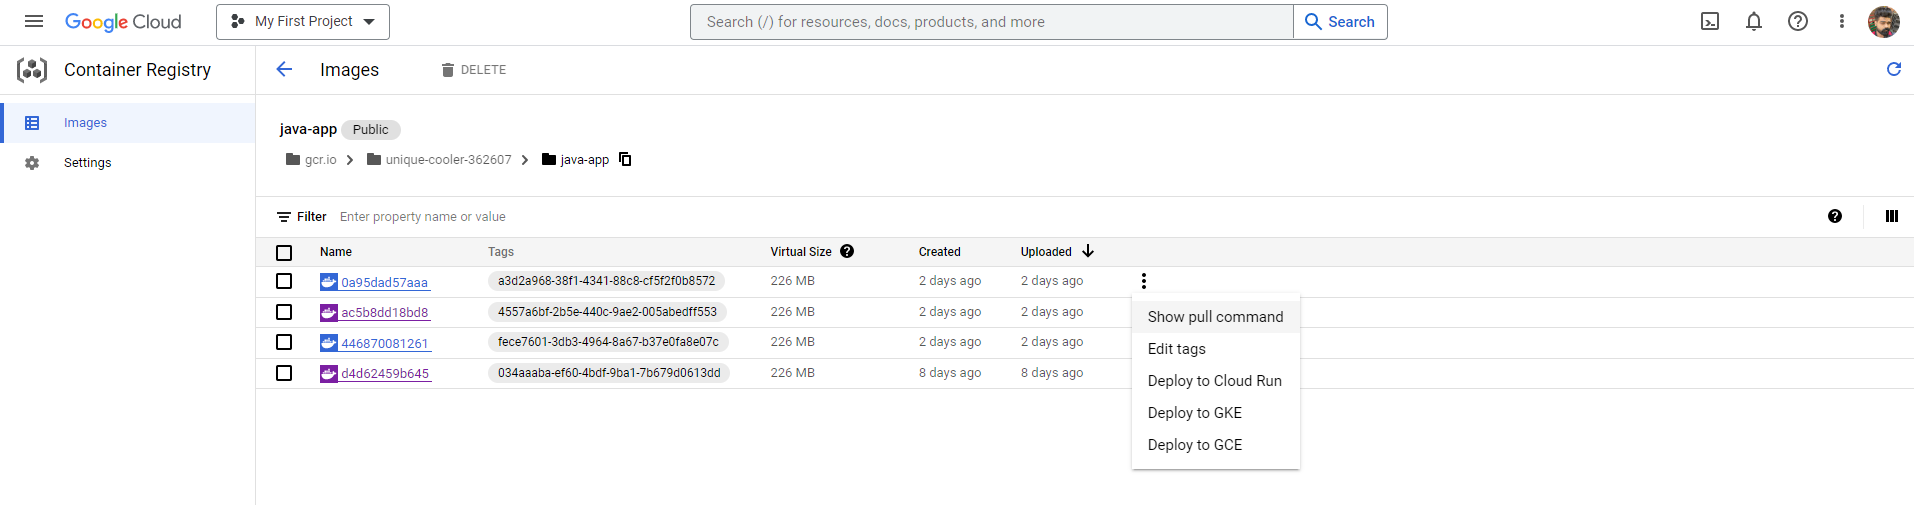
Now we can run the containerized java app from GCP.
Container Registry > Images > java-app > Select Image > Show Pull Command
Let’s try running our container image in a cloud shell / VM .
For that we can use these docker commands.
To pull docker image of our containerized java app from the registry
$ docker pull your_image_name
To view the images
$docker images
To run the container
$docker run -it image_name
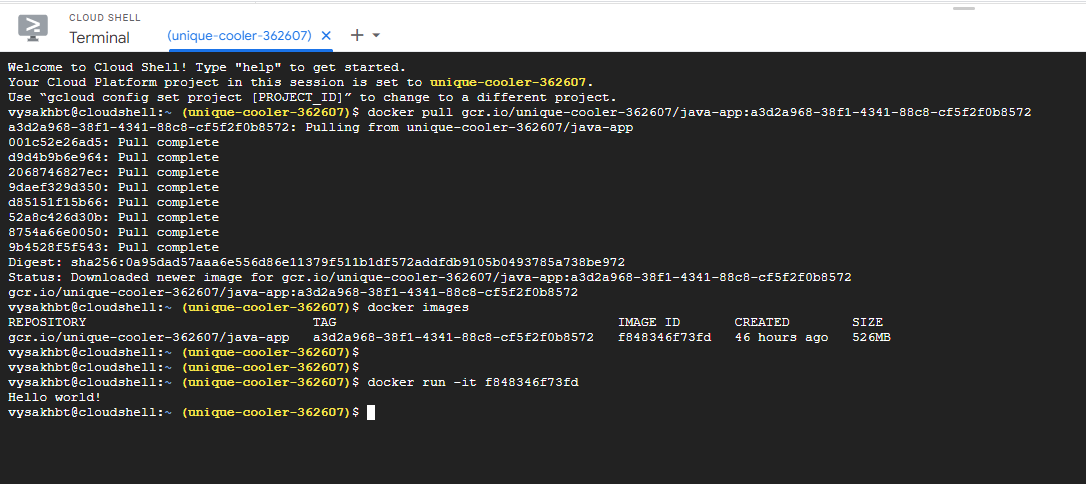
“Hello World!” is our expected output.
If you have any queries contact us at 📲 +91-81295 71359 or email us at support@keyshell.net